This guide will define the brief authoring guide of Salary Details.
Last update: June 15, 2024
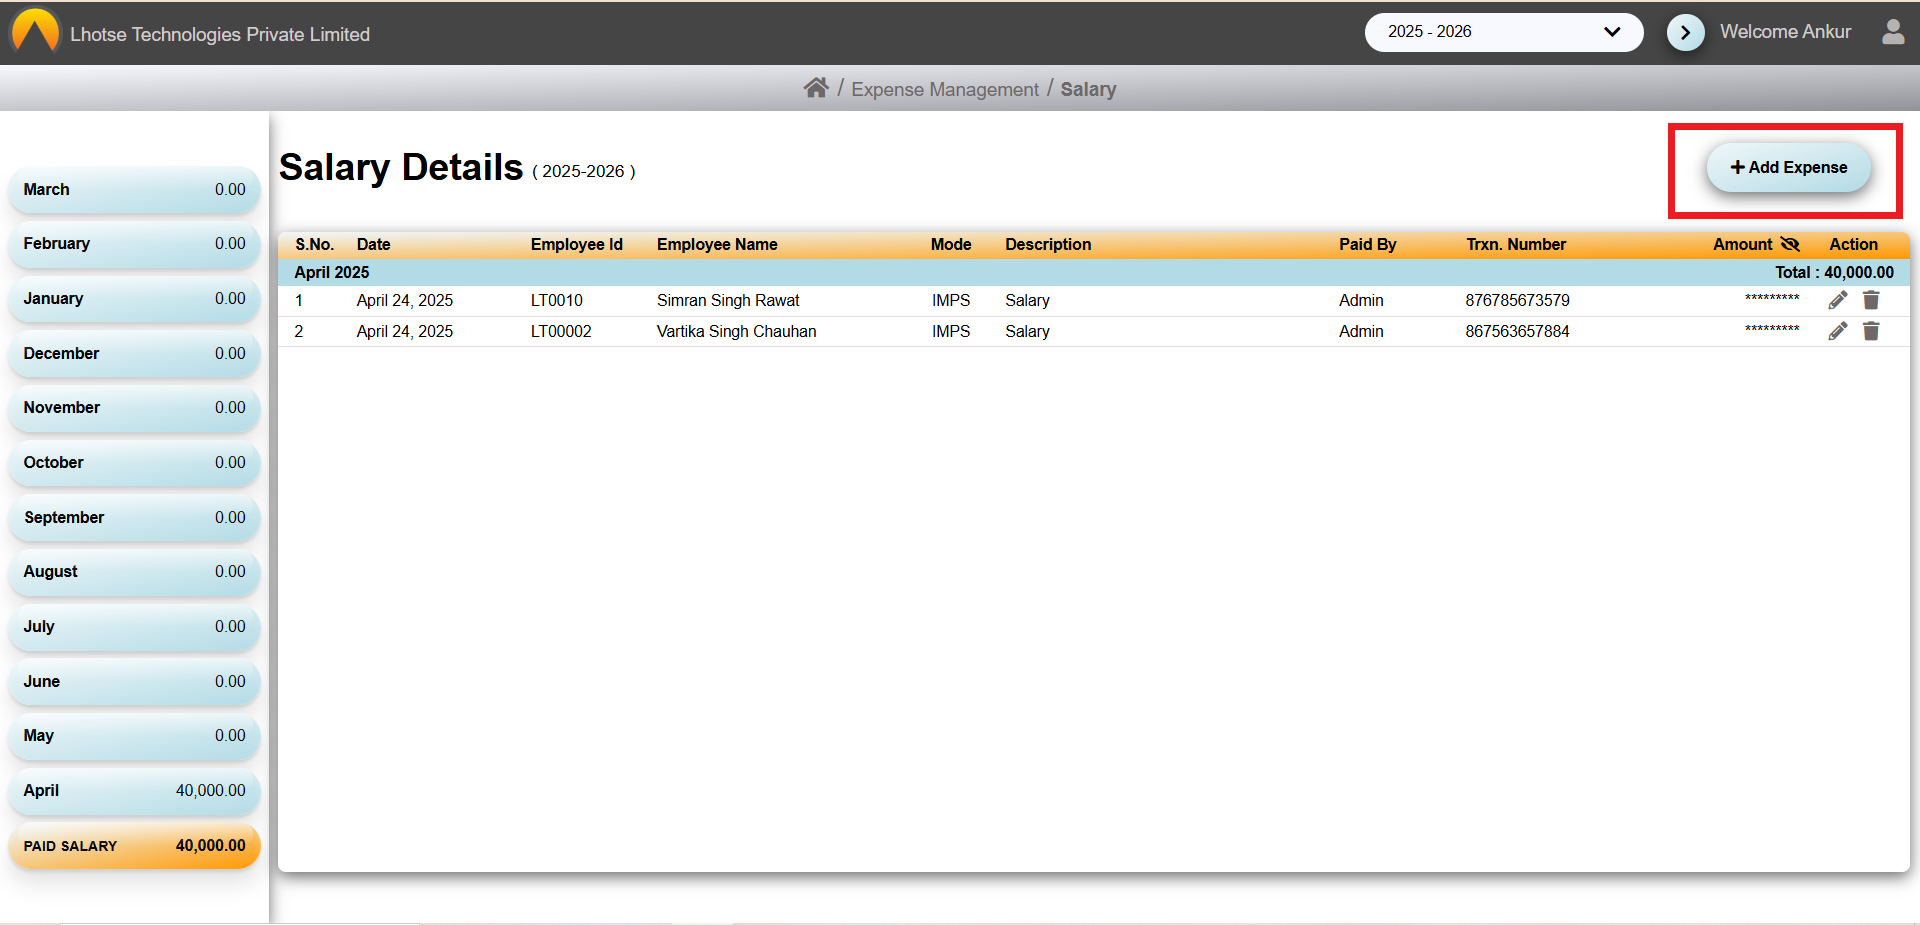
To save a new Salary record the Author needs to click on the Add Expense Button as shown in the below UI.
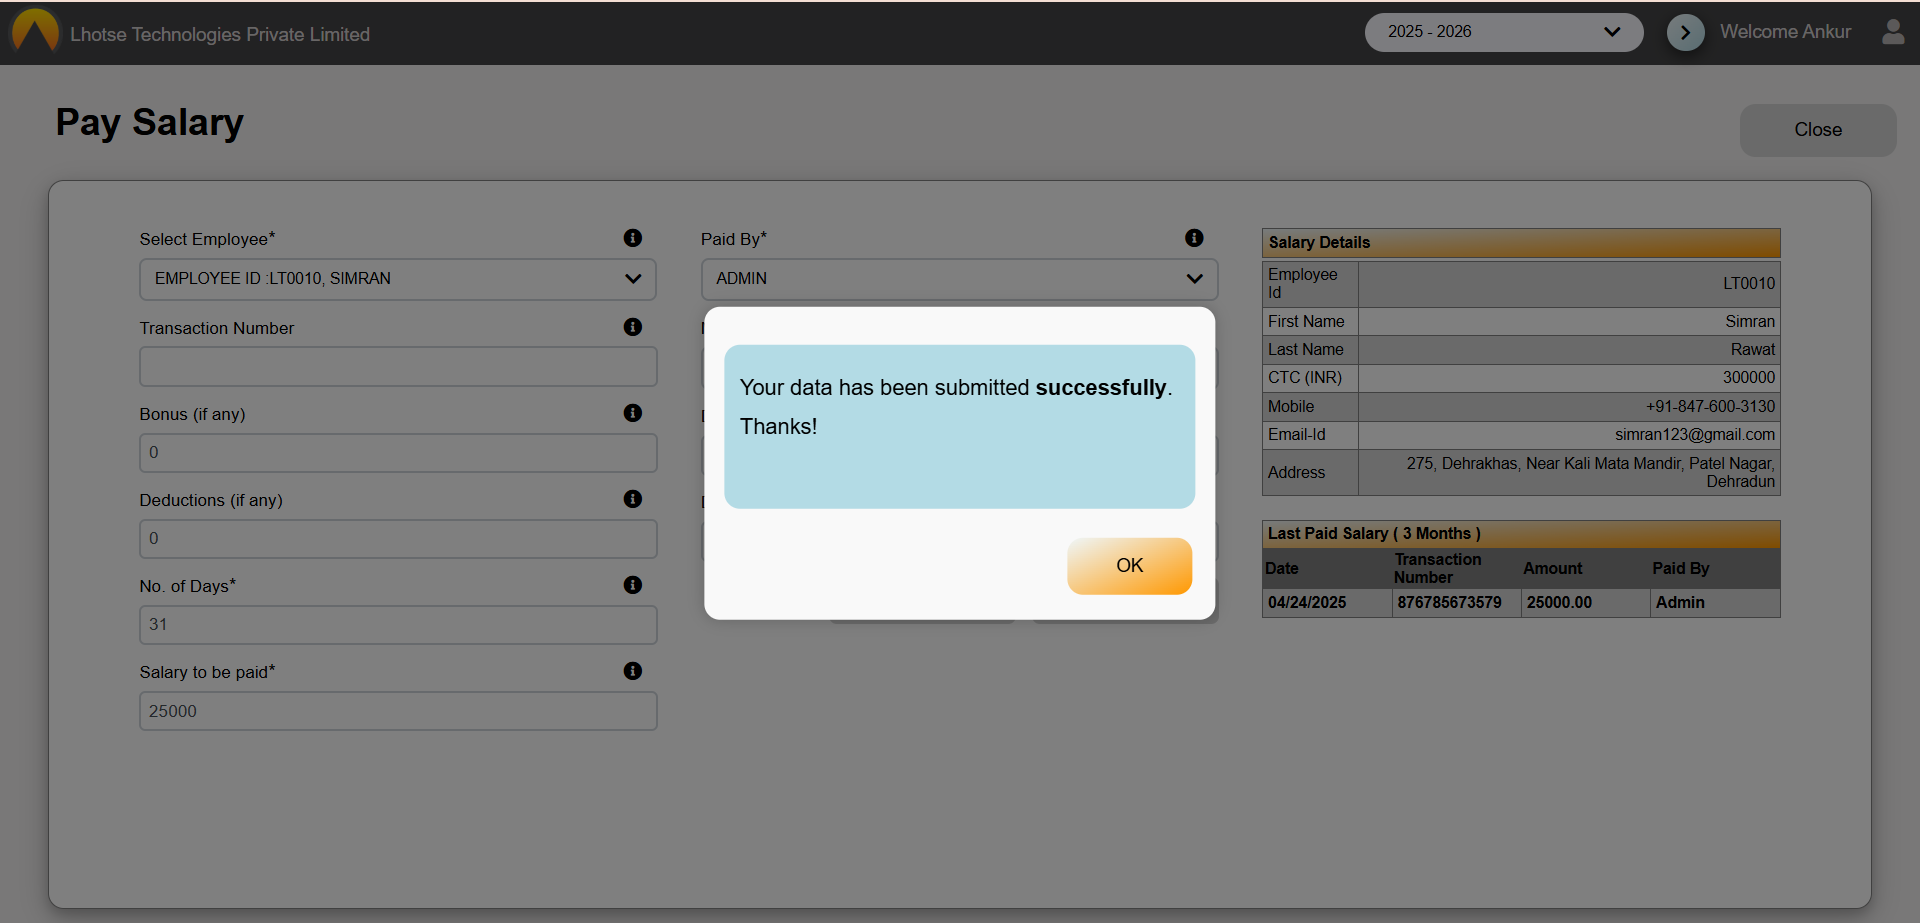
After clicking on the Add Expense Button, Author will be navigated to the salary Form, as shown in the UI below.
Let me guide you the below screen in detail.

Fill the required details to save the Salary Record.
Please re-check all the information carefully before submitting.
Once the author selects an employee ID to save a salary record, all other details related to that employee will be autofilled. This includes the number of days, which will be autofilled based on the month in which the author is paying the salary. The employee's salary, paid by, and mode of payment will also be auto-selected, but these can be changed if the author wants to.
On the right-hand side, a salary details table will appear when the employee is selected from the dropdown. This table will contain the employee's contact details such as name, mobile, email, address and more. Below this, there will be another table displaying the details of the last three paid records.
After filling all the required details, save the data by clicking on the Save button.

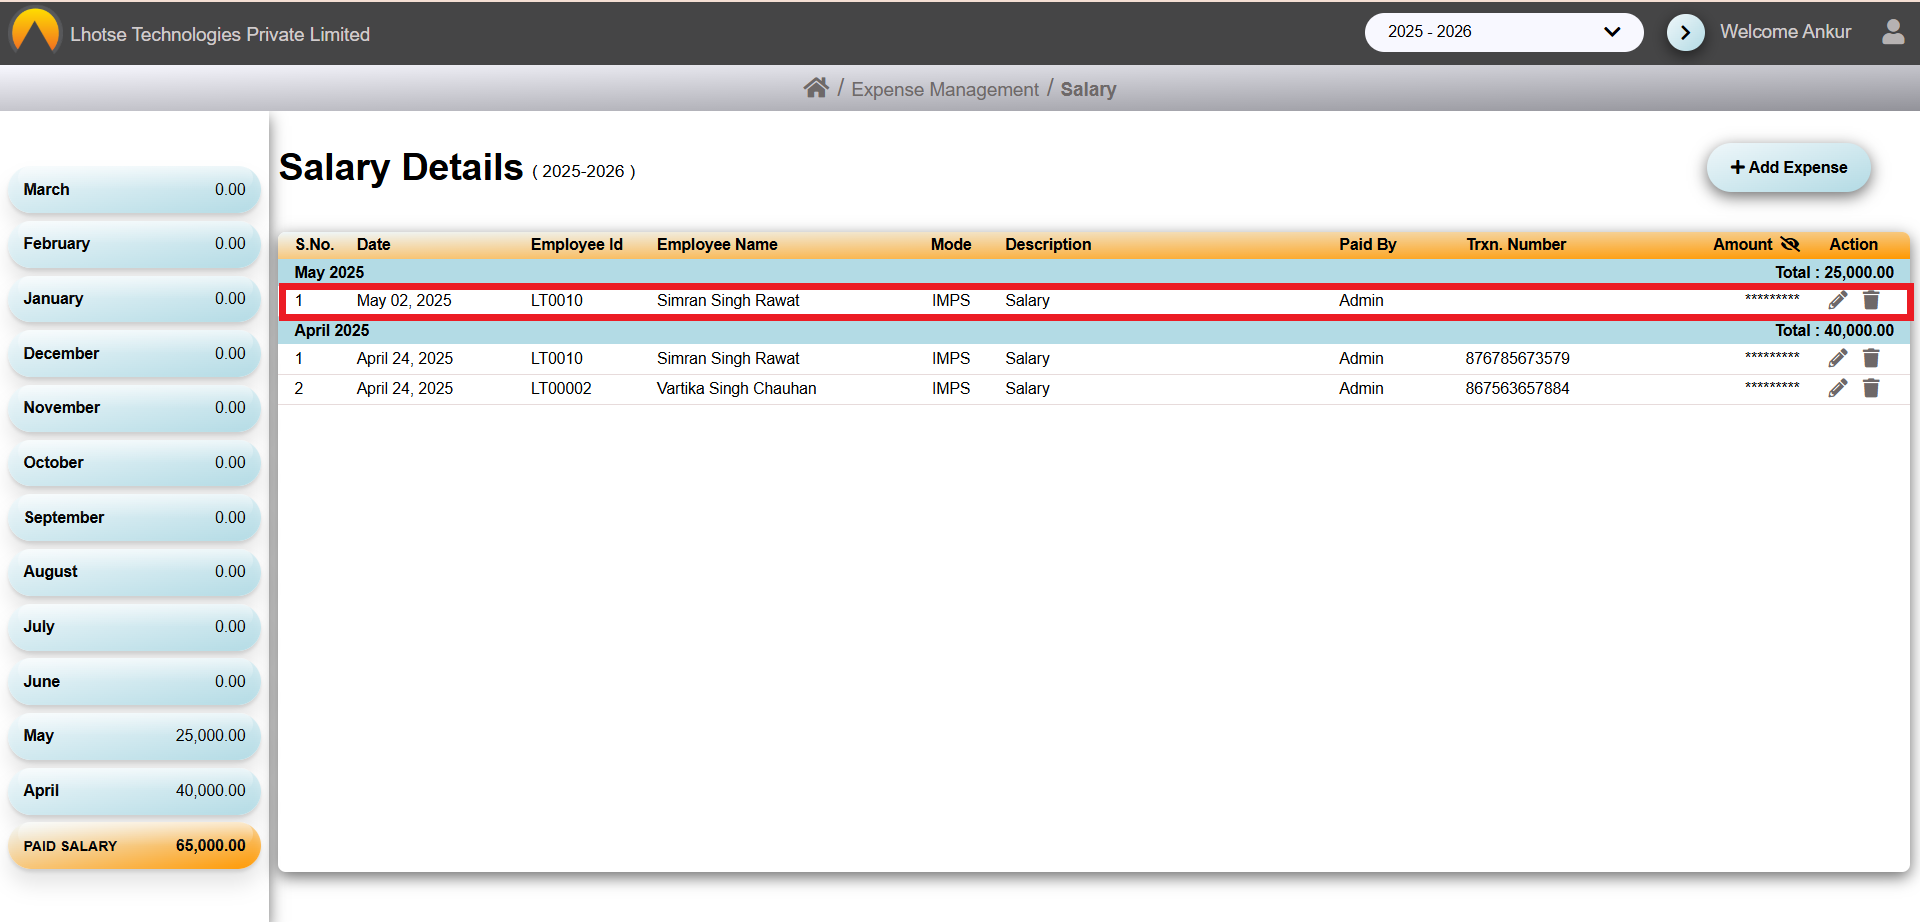
Once clicked, a popup will appear with the message of successfully submission of employee details.
Click the Ok button on the popup. And to see the newly created record click on the Back to listing button in the top right corner. The Author can see that the record has been added to the Salary listing.